Learn how to use Magic Editor on the Google Pixel 8 with ENBLE!
Maximizing Your Photos with the Google Pixel 8 Series' AI Technology, Featuring the Magic Editor A Guide
The Google Pixel devices have always been known for their cool photo editing features, and with the release of the Pixel 8 and Pixel 8 Pro, Google has taken it a step further with the introduction of Magic Editor. This feature utilizes the power of AI to help users move, resize, remove objects, alter colors, and apply stylized effects to their photos. In this article, we will explore how to use Magic Editor, examples of what it can do, and discuss why it can deliver both great and weird results.
Table of Contents
How to use Magic Editor
First things first, before you can use Magic Editor, make sure you have a Google Pixel 8 or Pixel 8 Pro. This feature is exclusively available on the latest Pixel devices. Once you have the device, ensure that the photo you want to edit is saved in the cloud with Google Photos. If it’s not saved automatically over Wi-Fi, manually upload it via cellular data using the “upload to cloud” button.
Now, let’s dive into the steps to access Magic Editor:
- Open the Google Photos app on your Pixel 8 or Pixel 8 Pro.
- Find the photo you want to edit and open it.
- Select “Edit.”
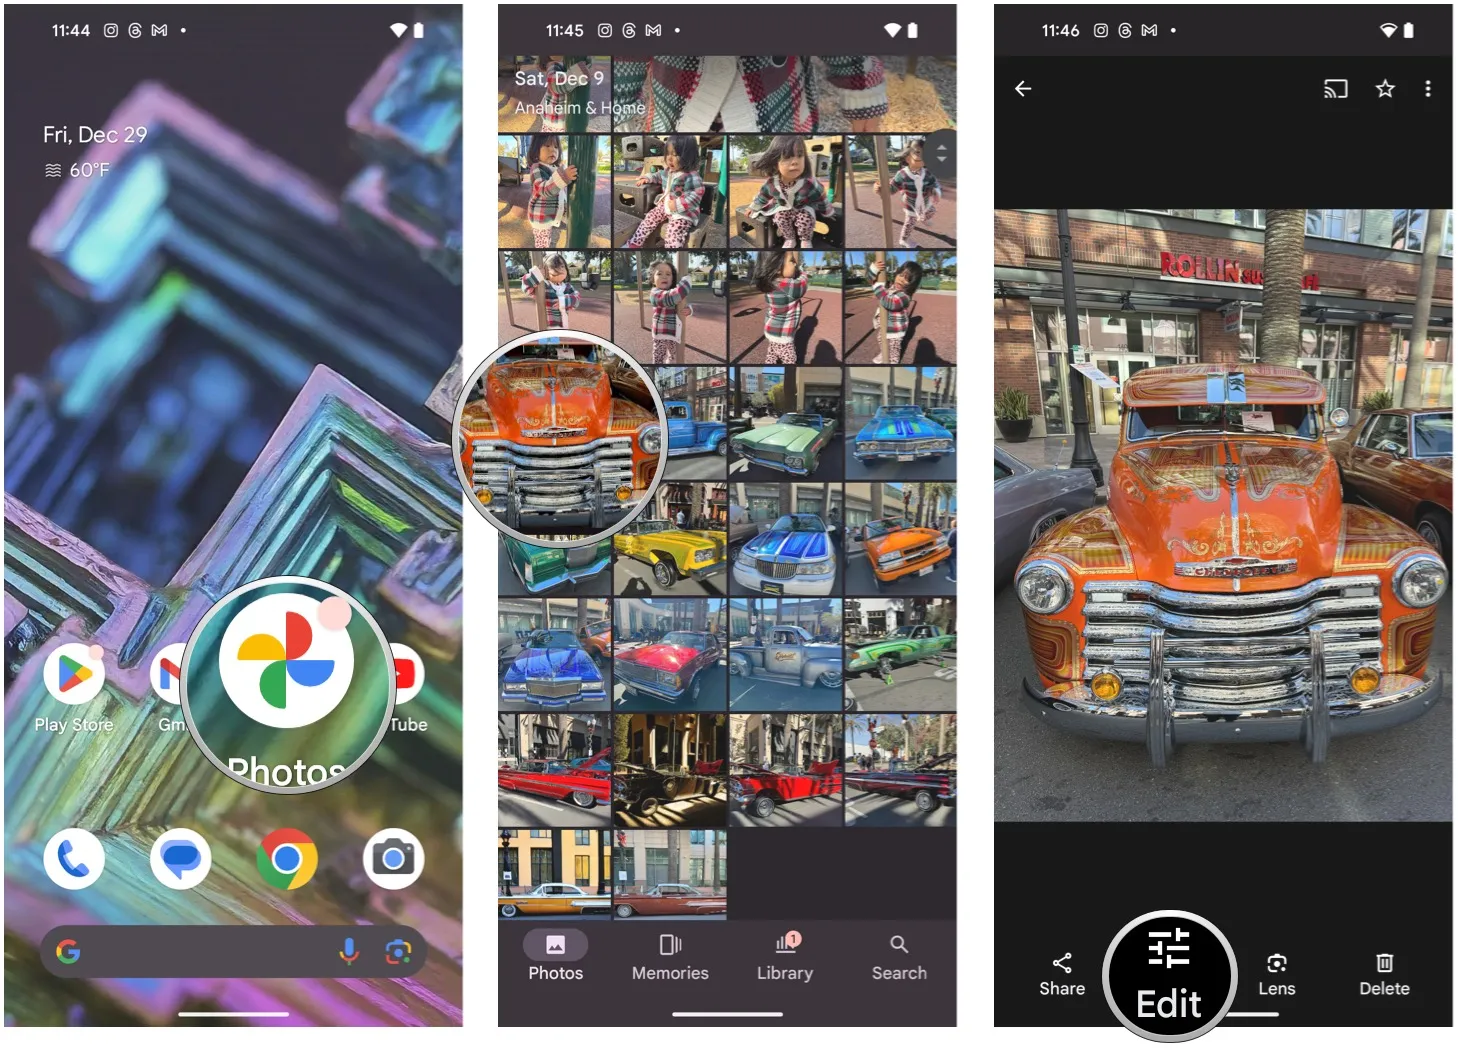
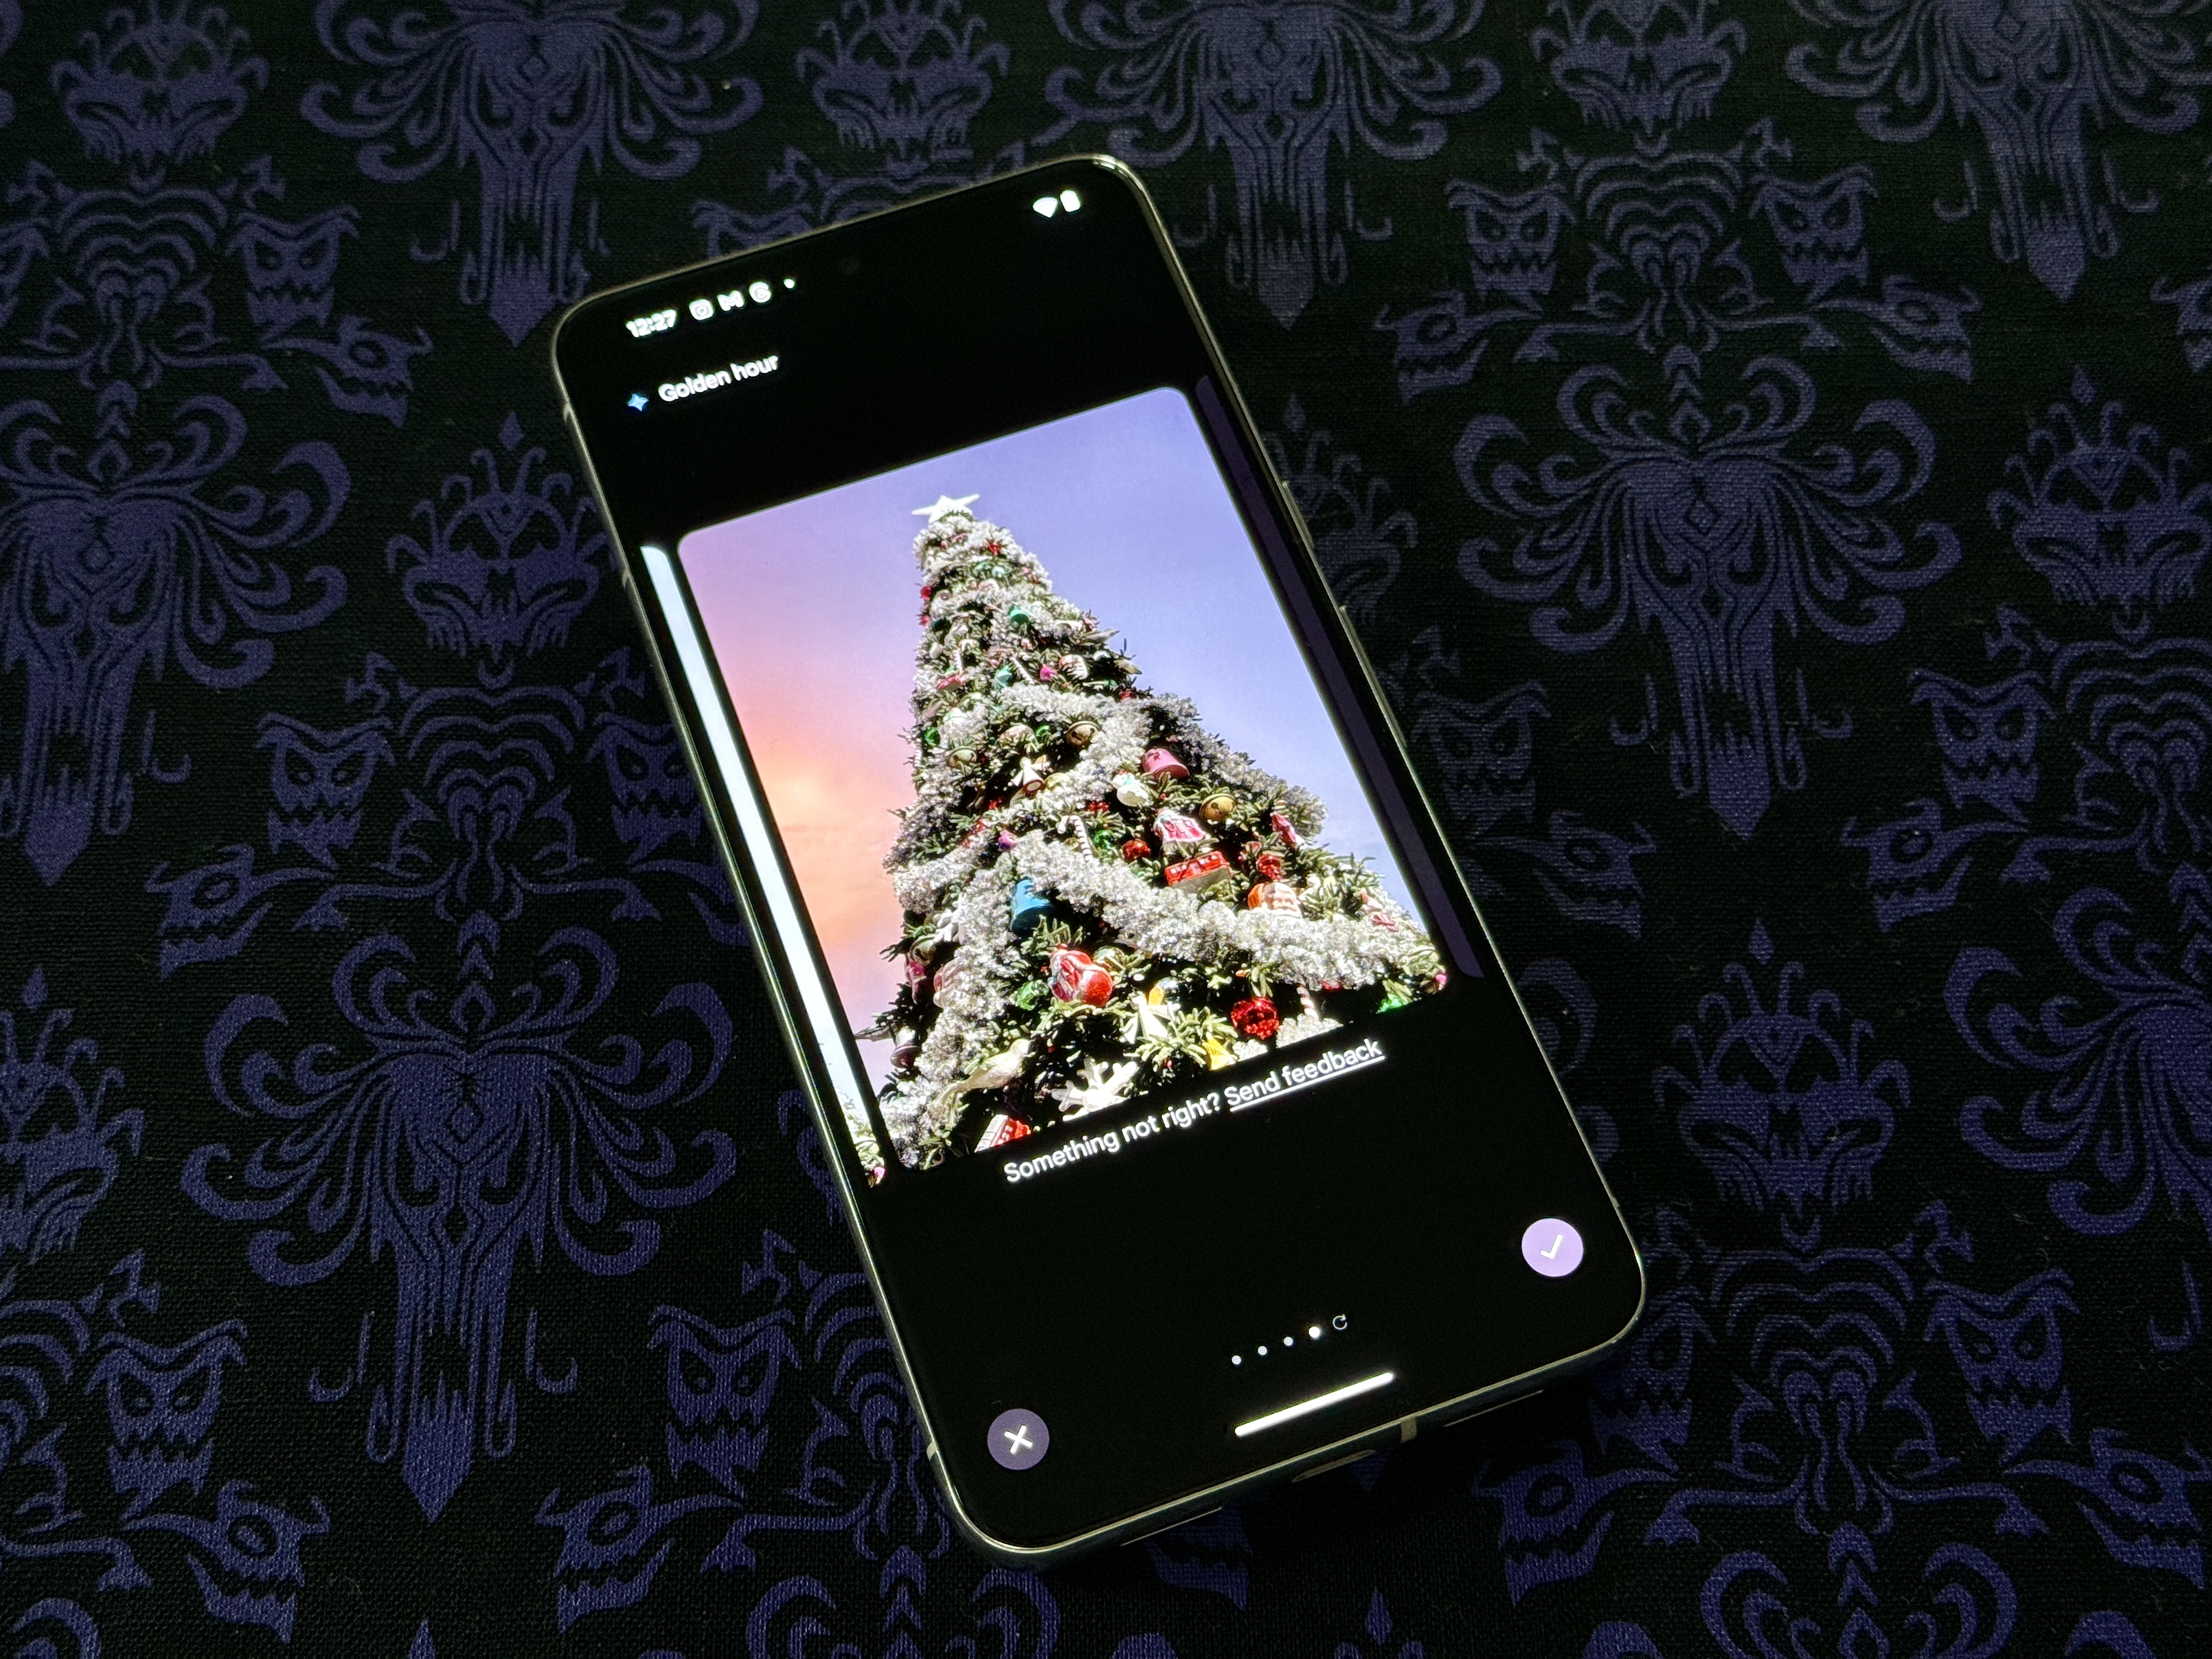
- Tap the multicolored button with a photo and sparkle icon to open Magic Editor.
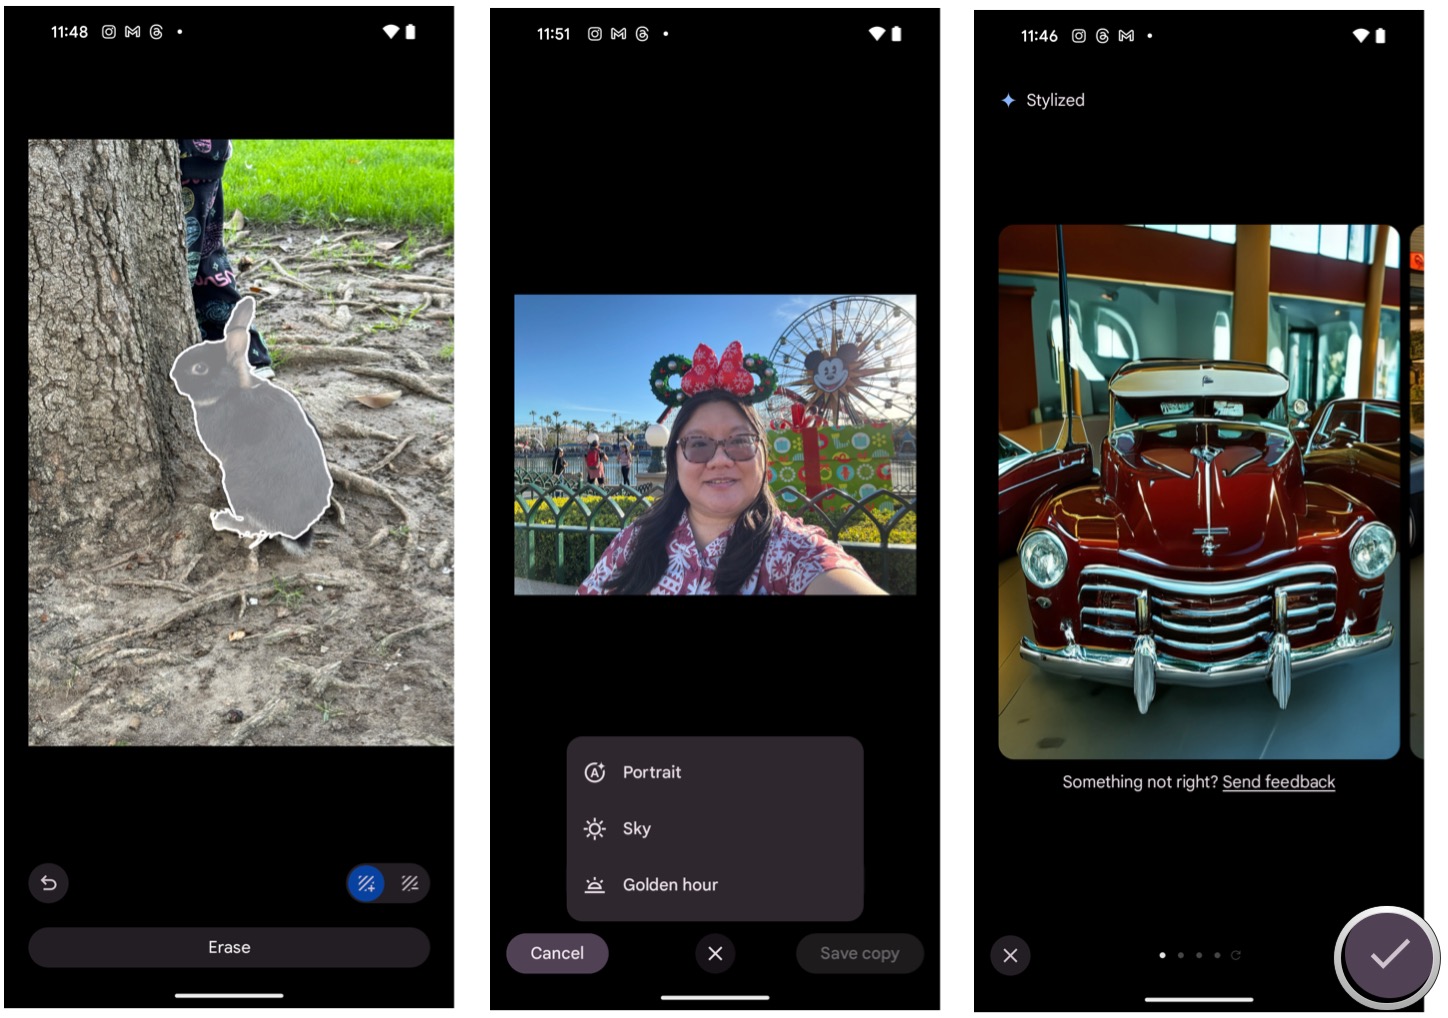
- Choose the sections of the photo you want to erase or edit. You can use painting or circling for more accurate results.
- To resize or move an object, tap and hold, then pinch or drag.
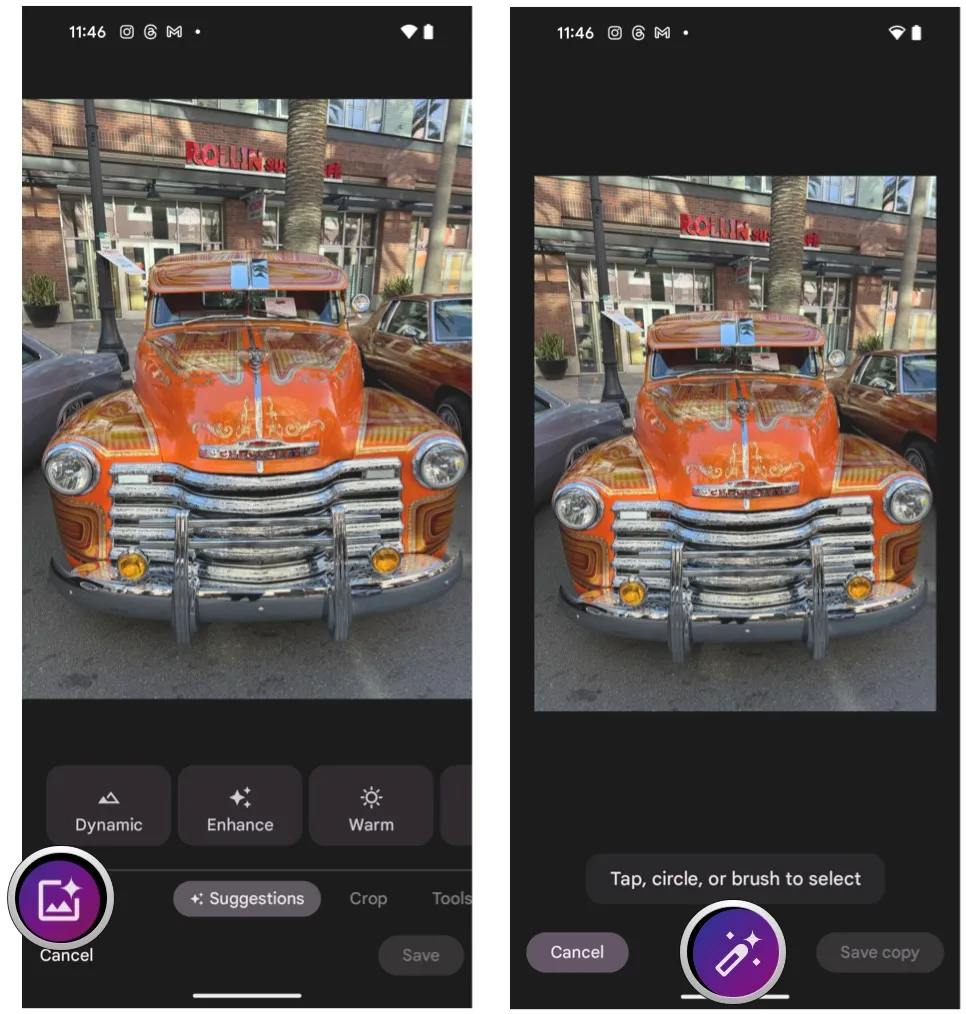
- For additional editing options, tap the magic wand at the bottom to explore choices like the Sky or Golden Hour effects.
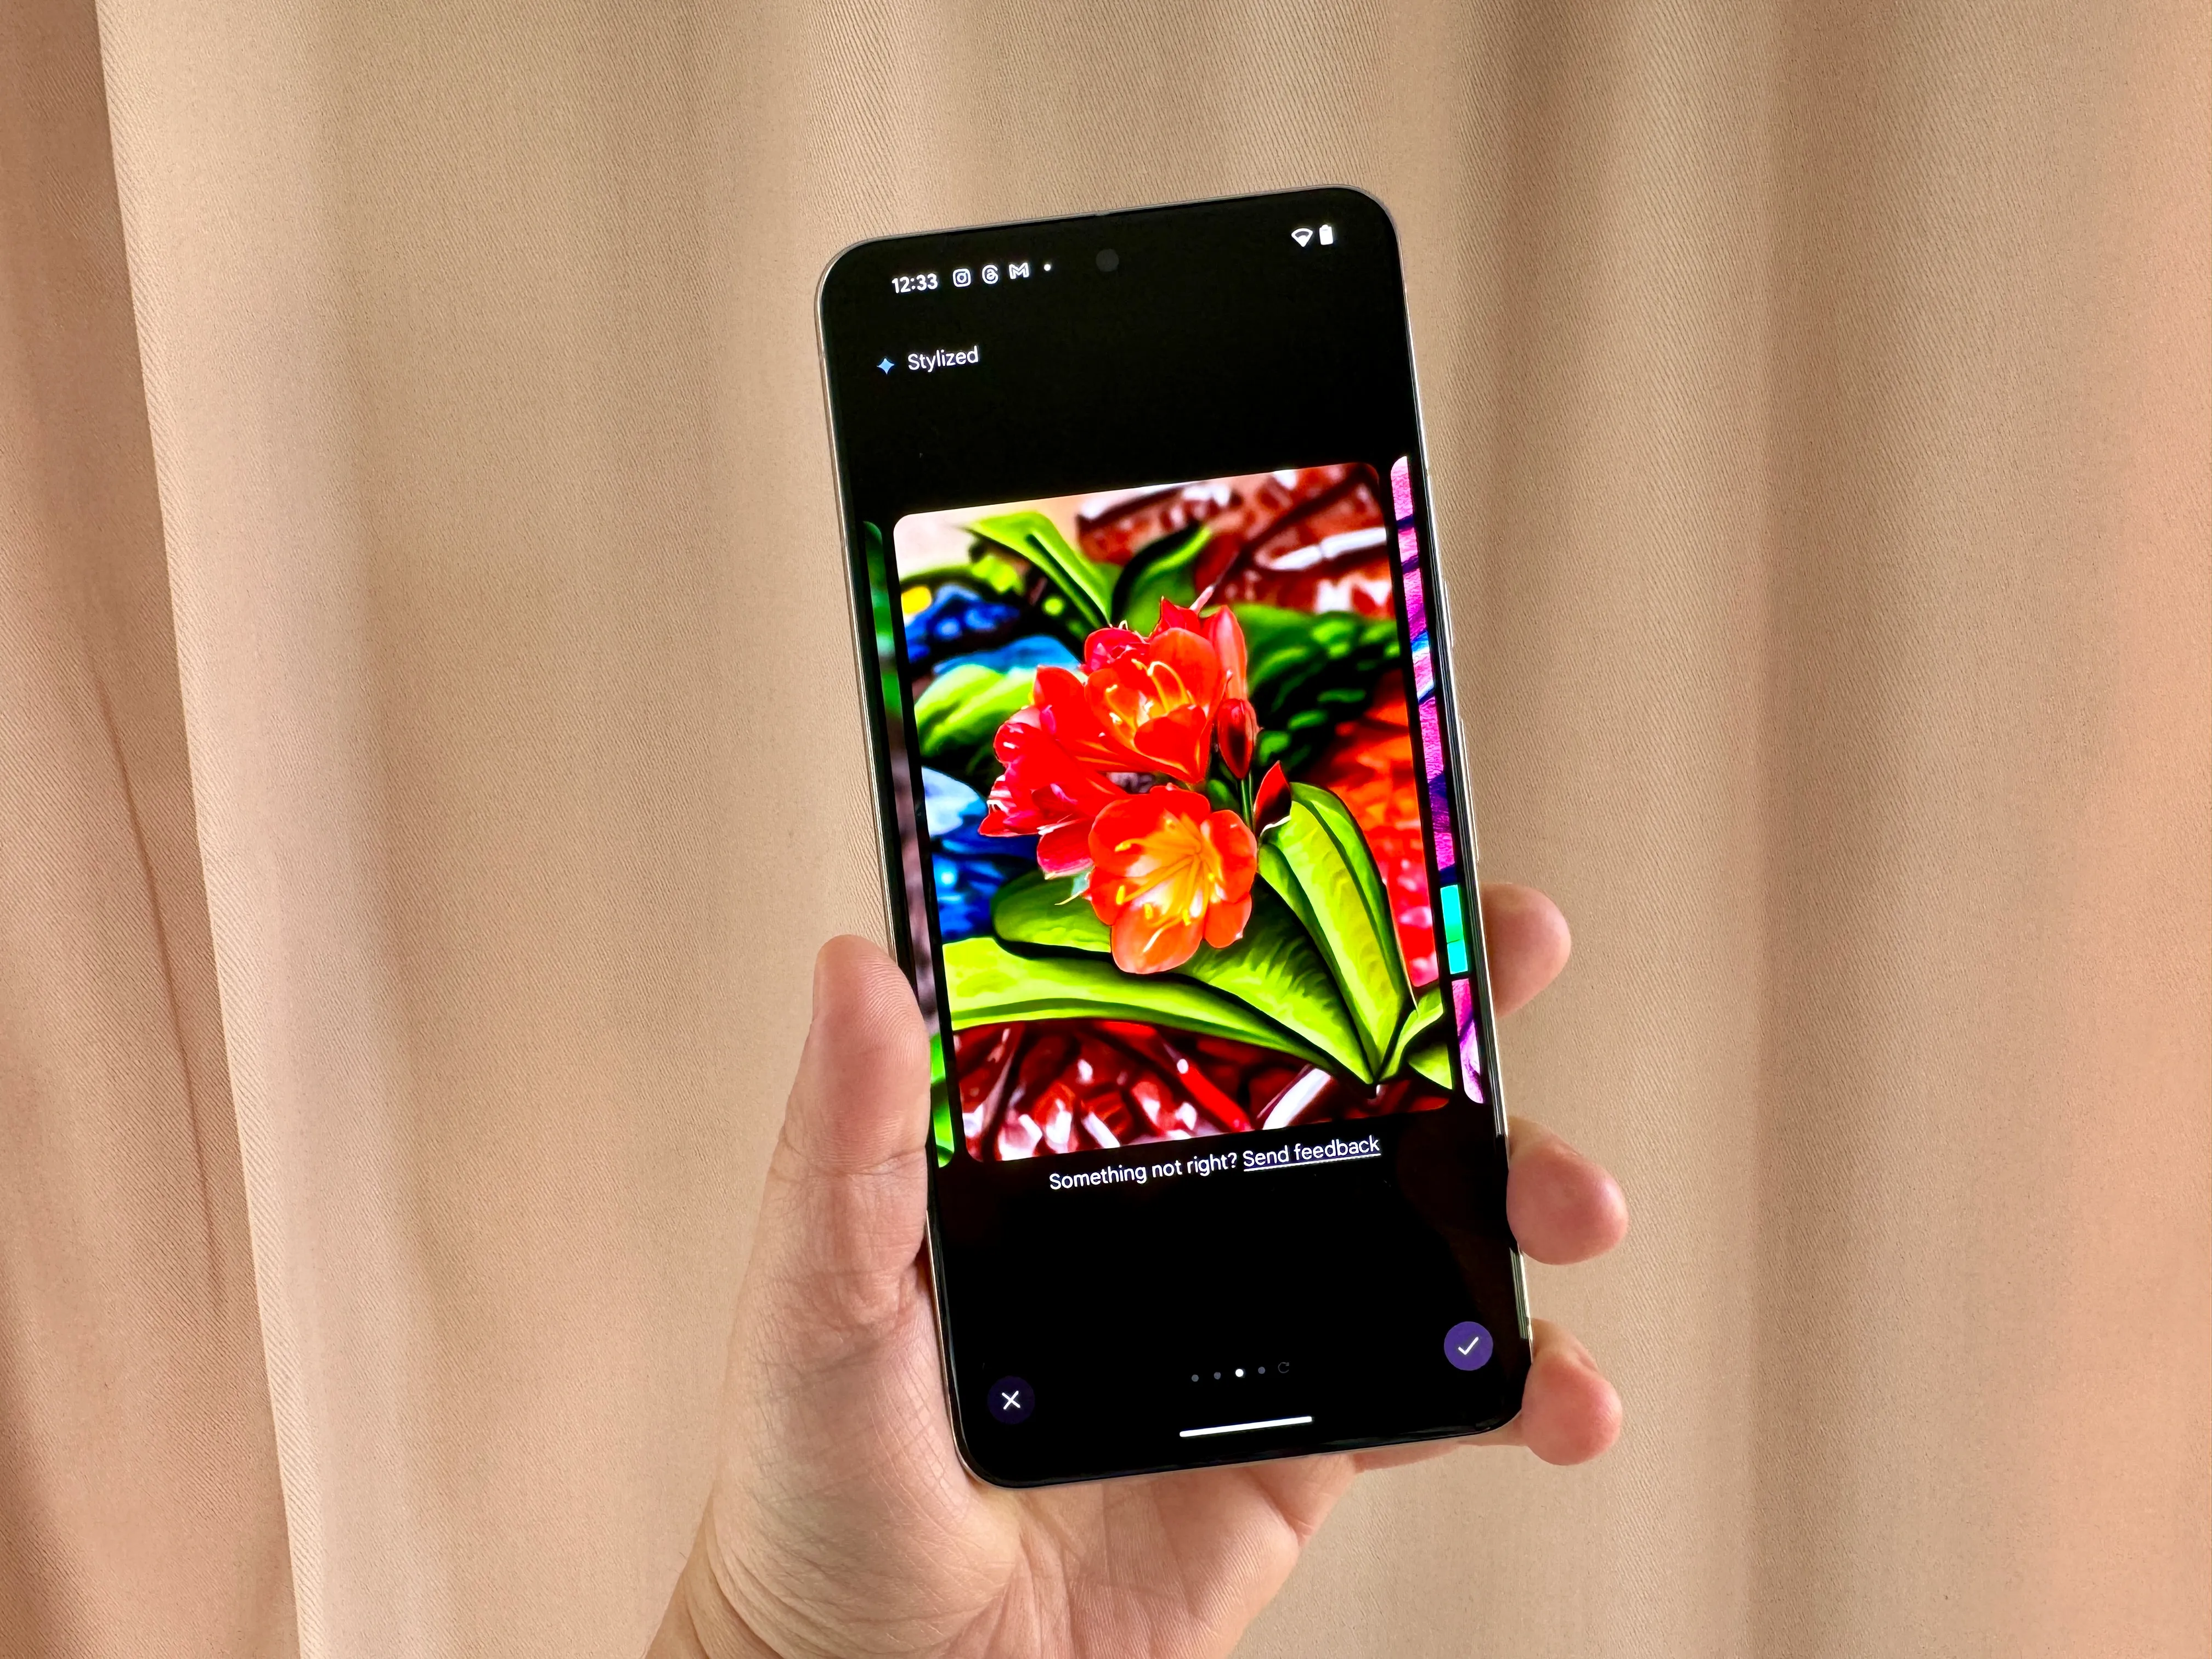
- Magic Editor will generate four possible options using AI. Select the checkmark to save a copy of the edited image or scroll to the right and choose “Get a new set of results” if you’re not satisfied with the current ones.
- Finally, select the checkmark and then “Save copy” to preserve your edits while keeping the original image intact.
Although the Magic Editor can deliver fantastic results, it can also have some misses. Some images may turn out weird or appear unnatural. Let’s take a look at some examples to understand the capabilities and limitations of Magic Editor.
Examples of what Magic Editor can do
Magic Editor’s potential for edits depends on the image you’re working with. Here are a few examples:
- 🎹 Learn to Play the Piano in 2024 with These Awesome Apps! 🎹
- Top color laser printers for 2023, thoroughly tested and reviewed b...
- Cutting the Cord: My Journey to Embrace Projector Life 📺🚀
-
Disneyland Hotel Pool Area:


In this image, we selected the sky area and “erased” it using Magic Editor. The result changed the sky’s color, added clouds, and more leaves to the palm trees. However, it also overlapped with the top of the hotel buildings, resulting in an AI-generated mess.
-
Sleeping Beauty Castle at Disneyland:
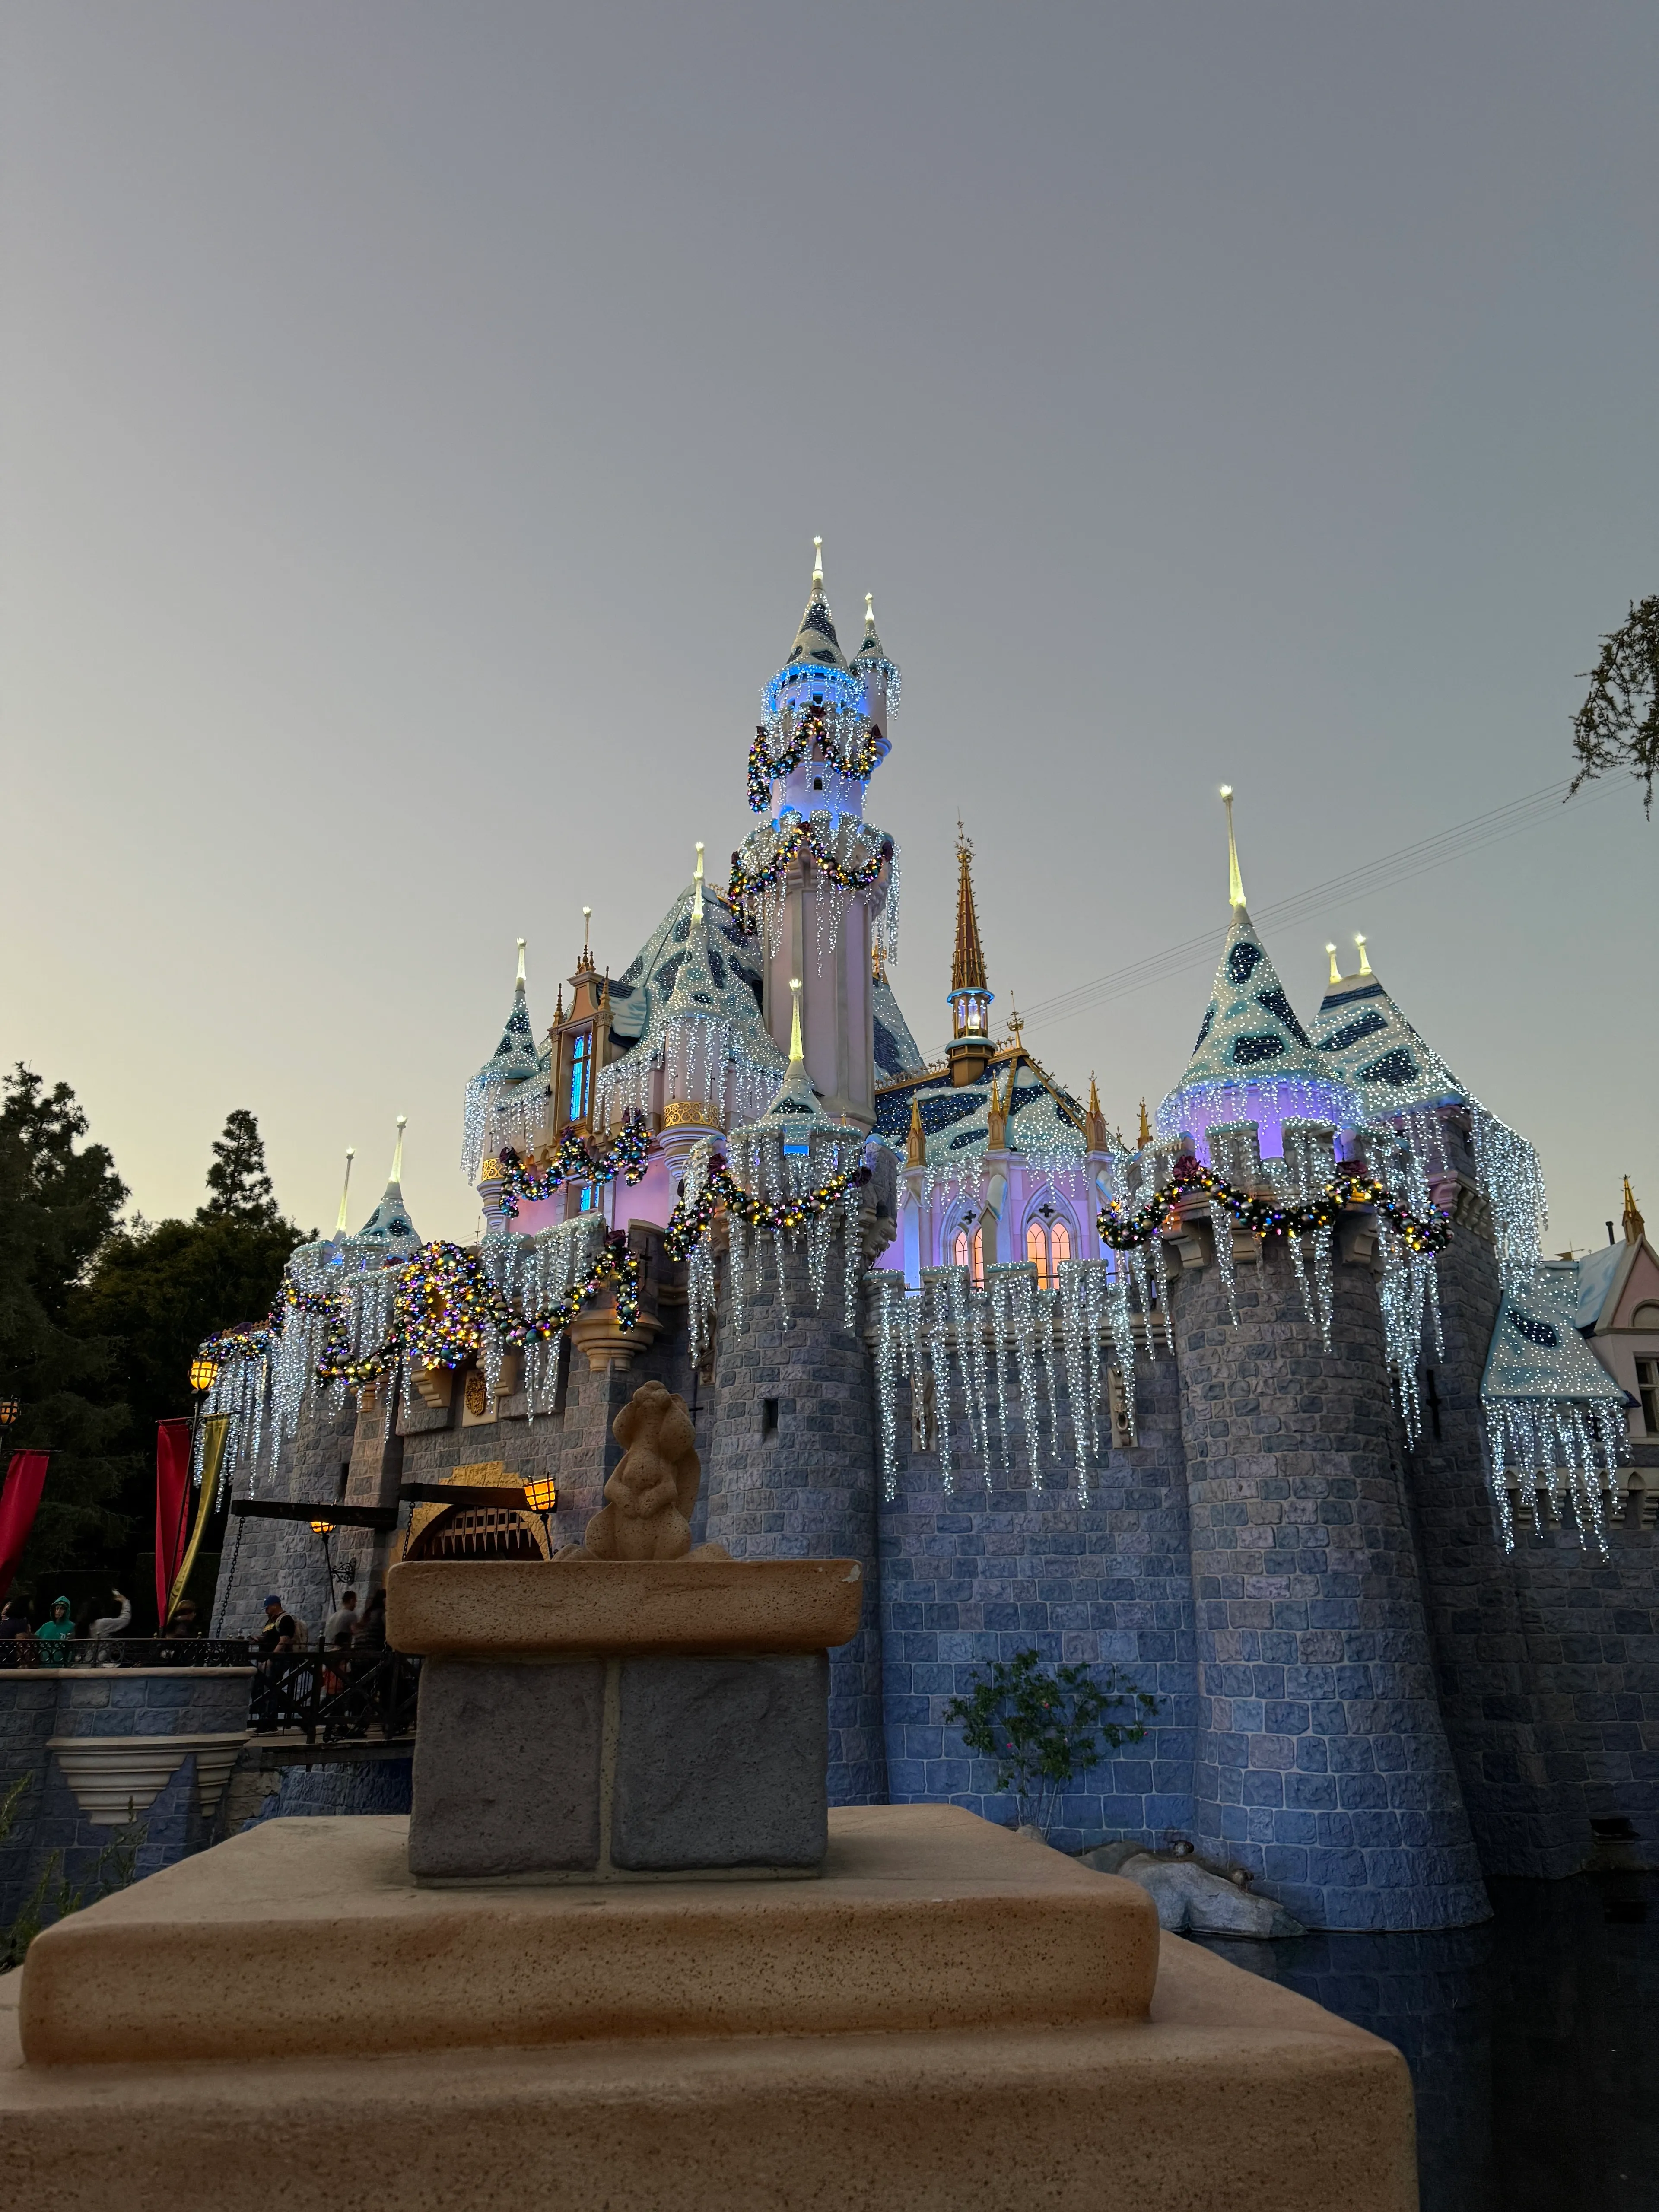
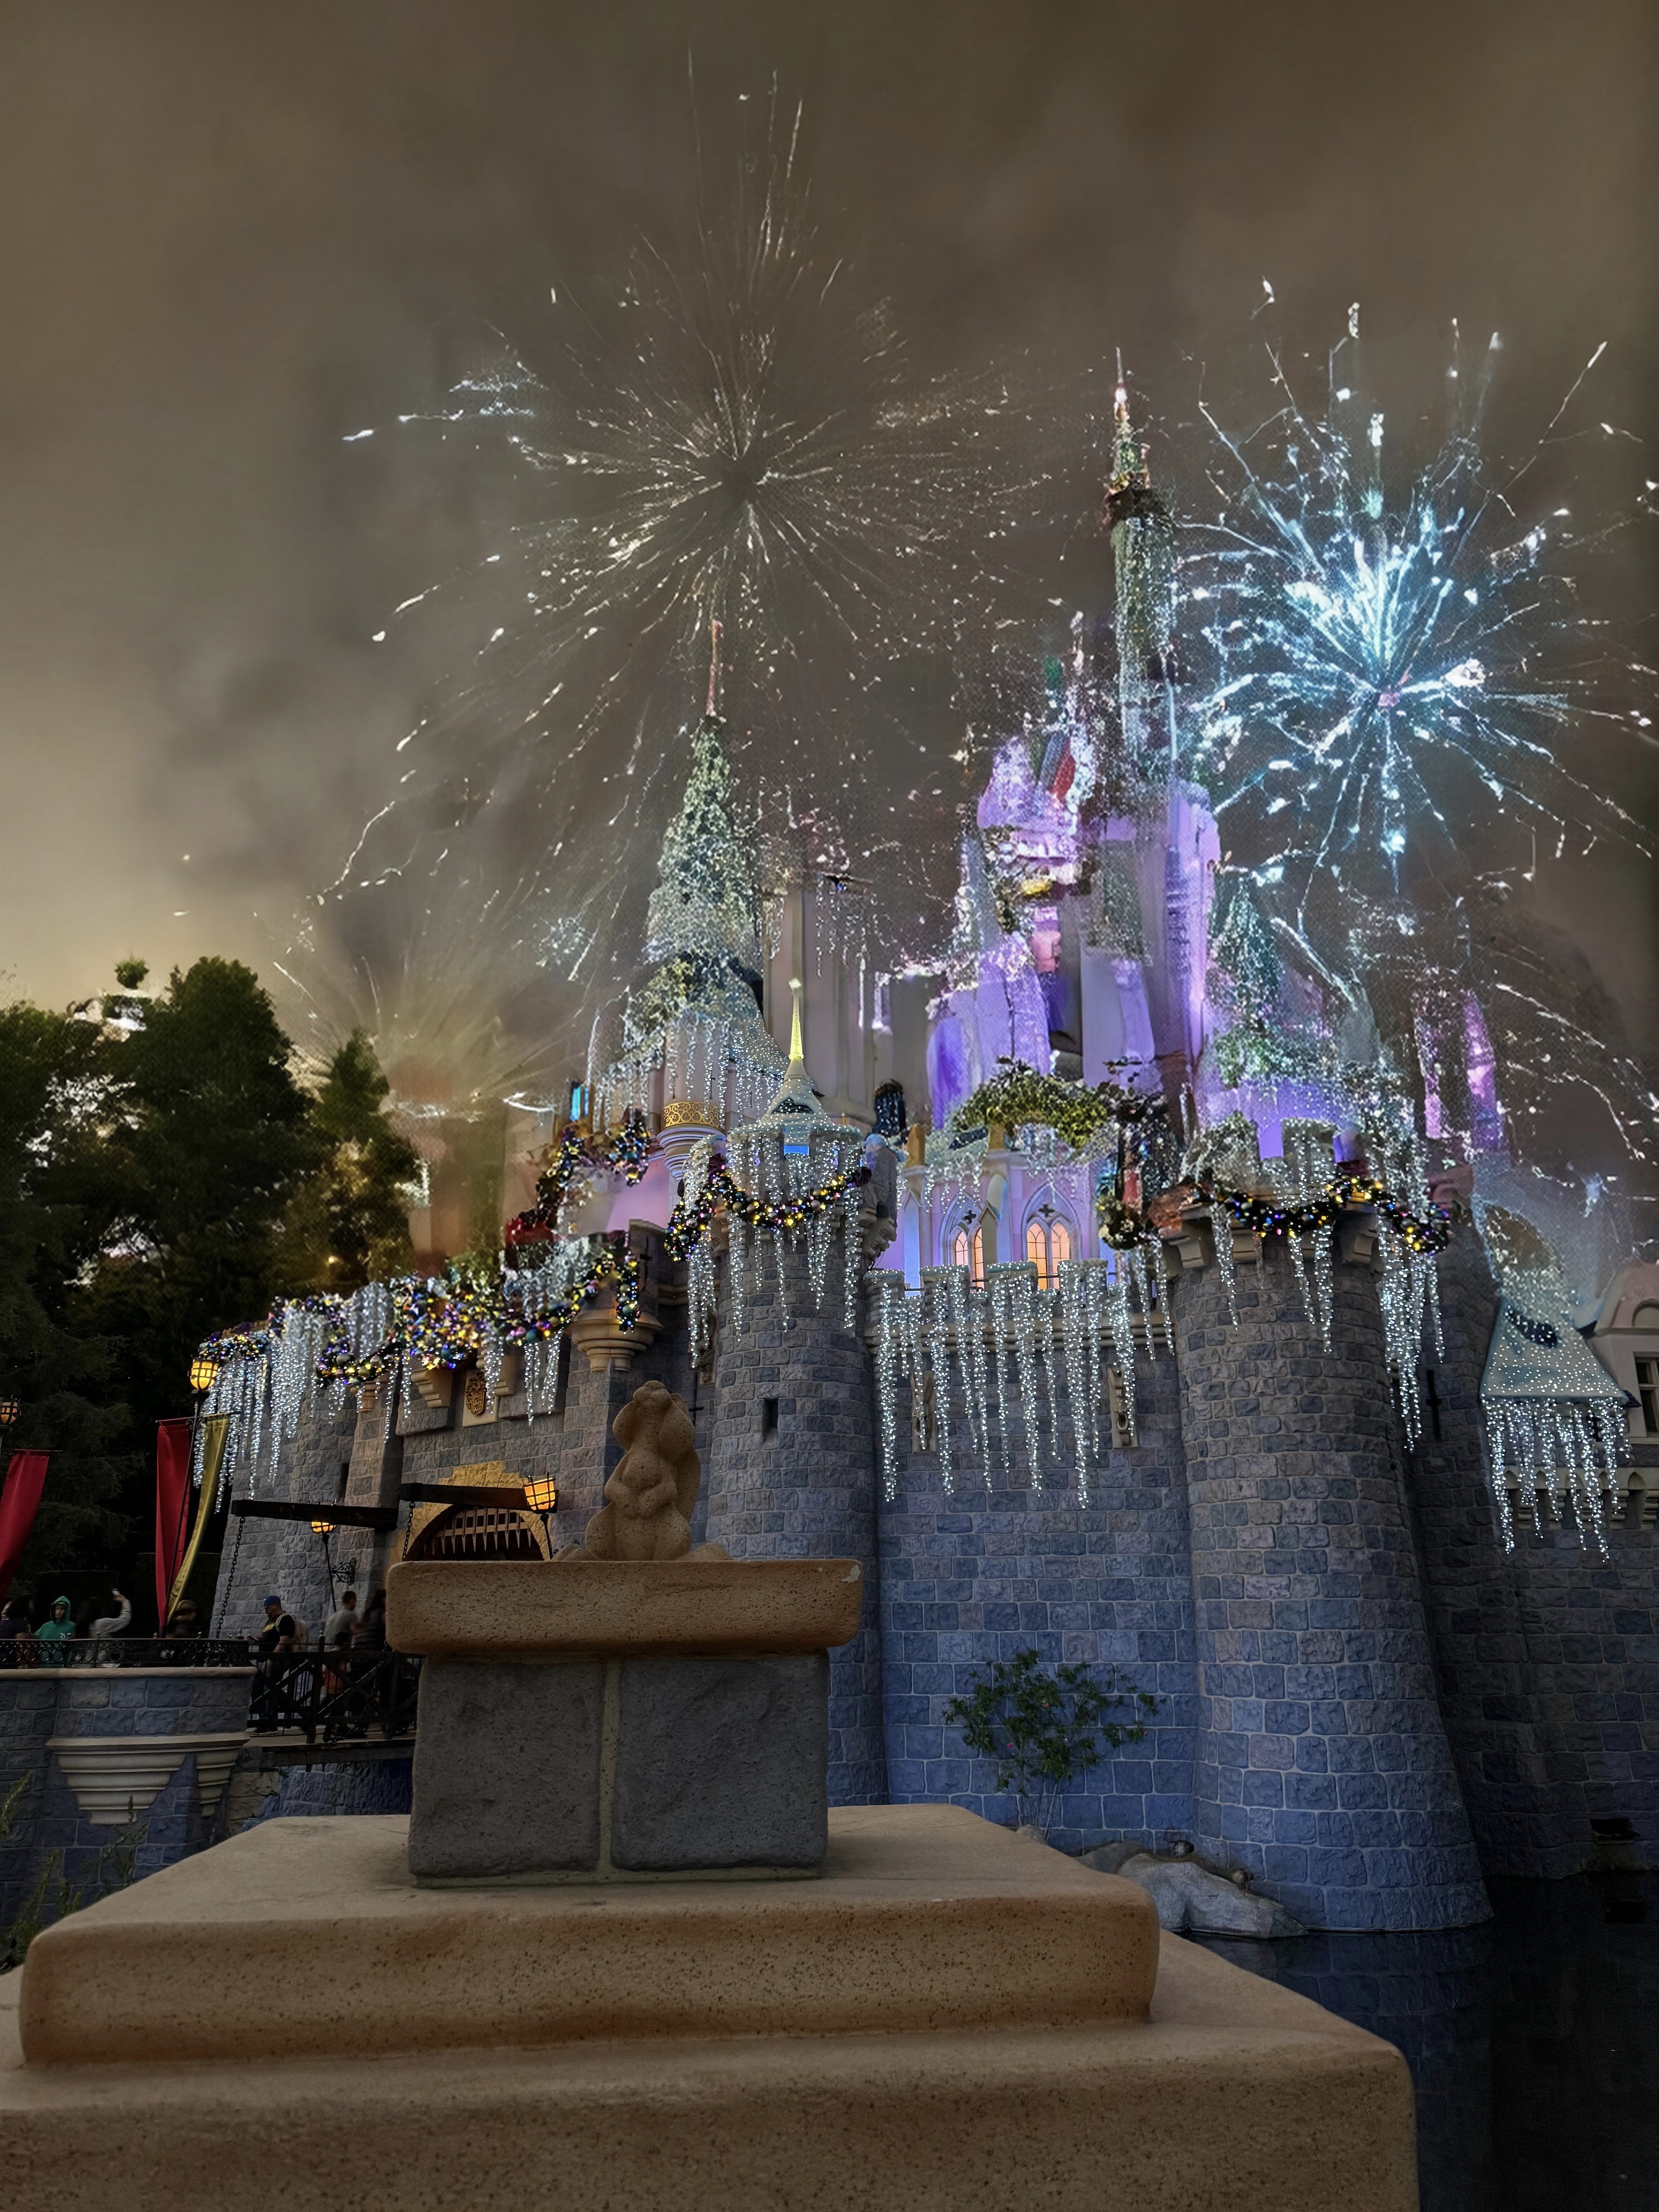
Magic Editor allowed us to change the appearance of the sky and added fireworks to this photo. However, it also distorted the castle’s steeples, resulting in an unintended mess.
-
Selfie at Disneyland:


Using the Golden Hour effect, Magic Editor transformed the sky into a beautiful purple-pink gradient, giving the impression of a sunset. The overall effect enhanced the photo’s ambiance.
-
Bunny Photo:


In this adorable bunny photo, we used Magic Editor to resize the bunny, making it larger and placed it closer. The AI-filled the original spot with a natural-looking background, resulting in an impressive edit.
-
Pixar Pier at Disney California Adventure:
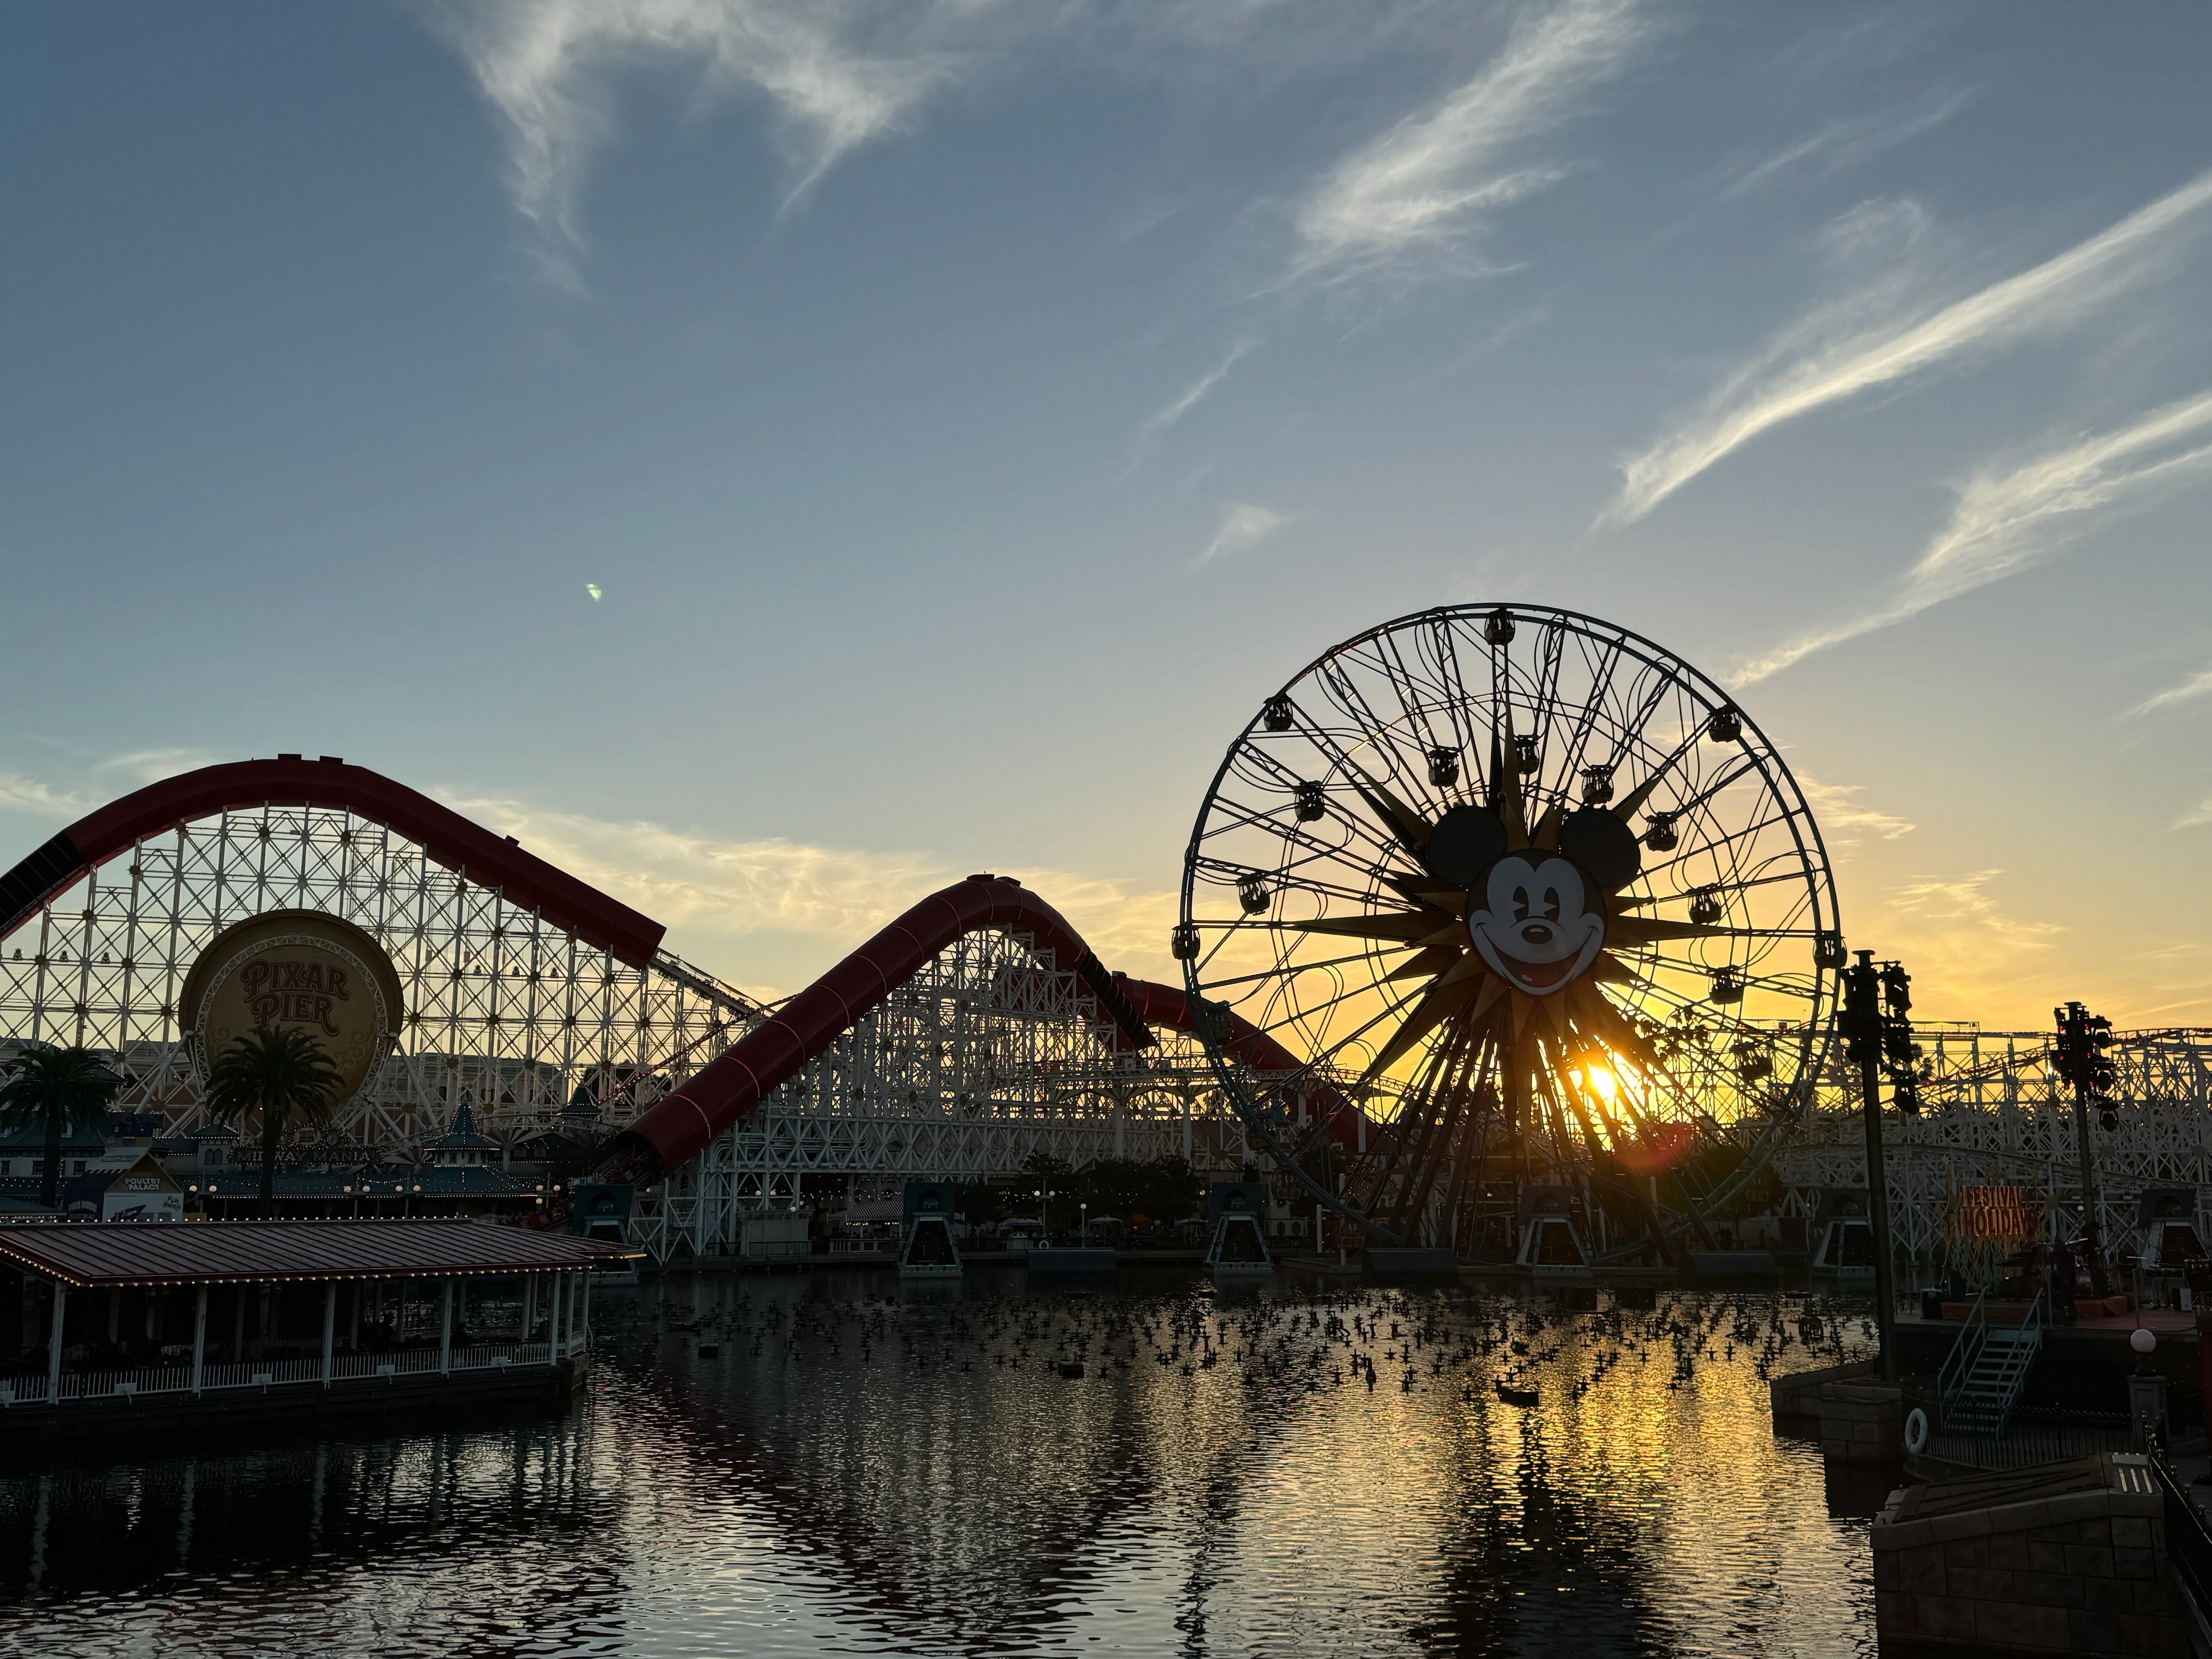
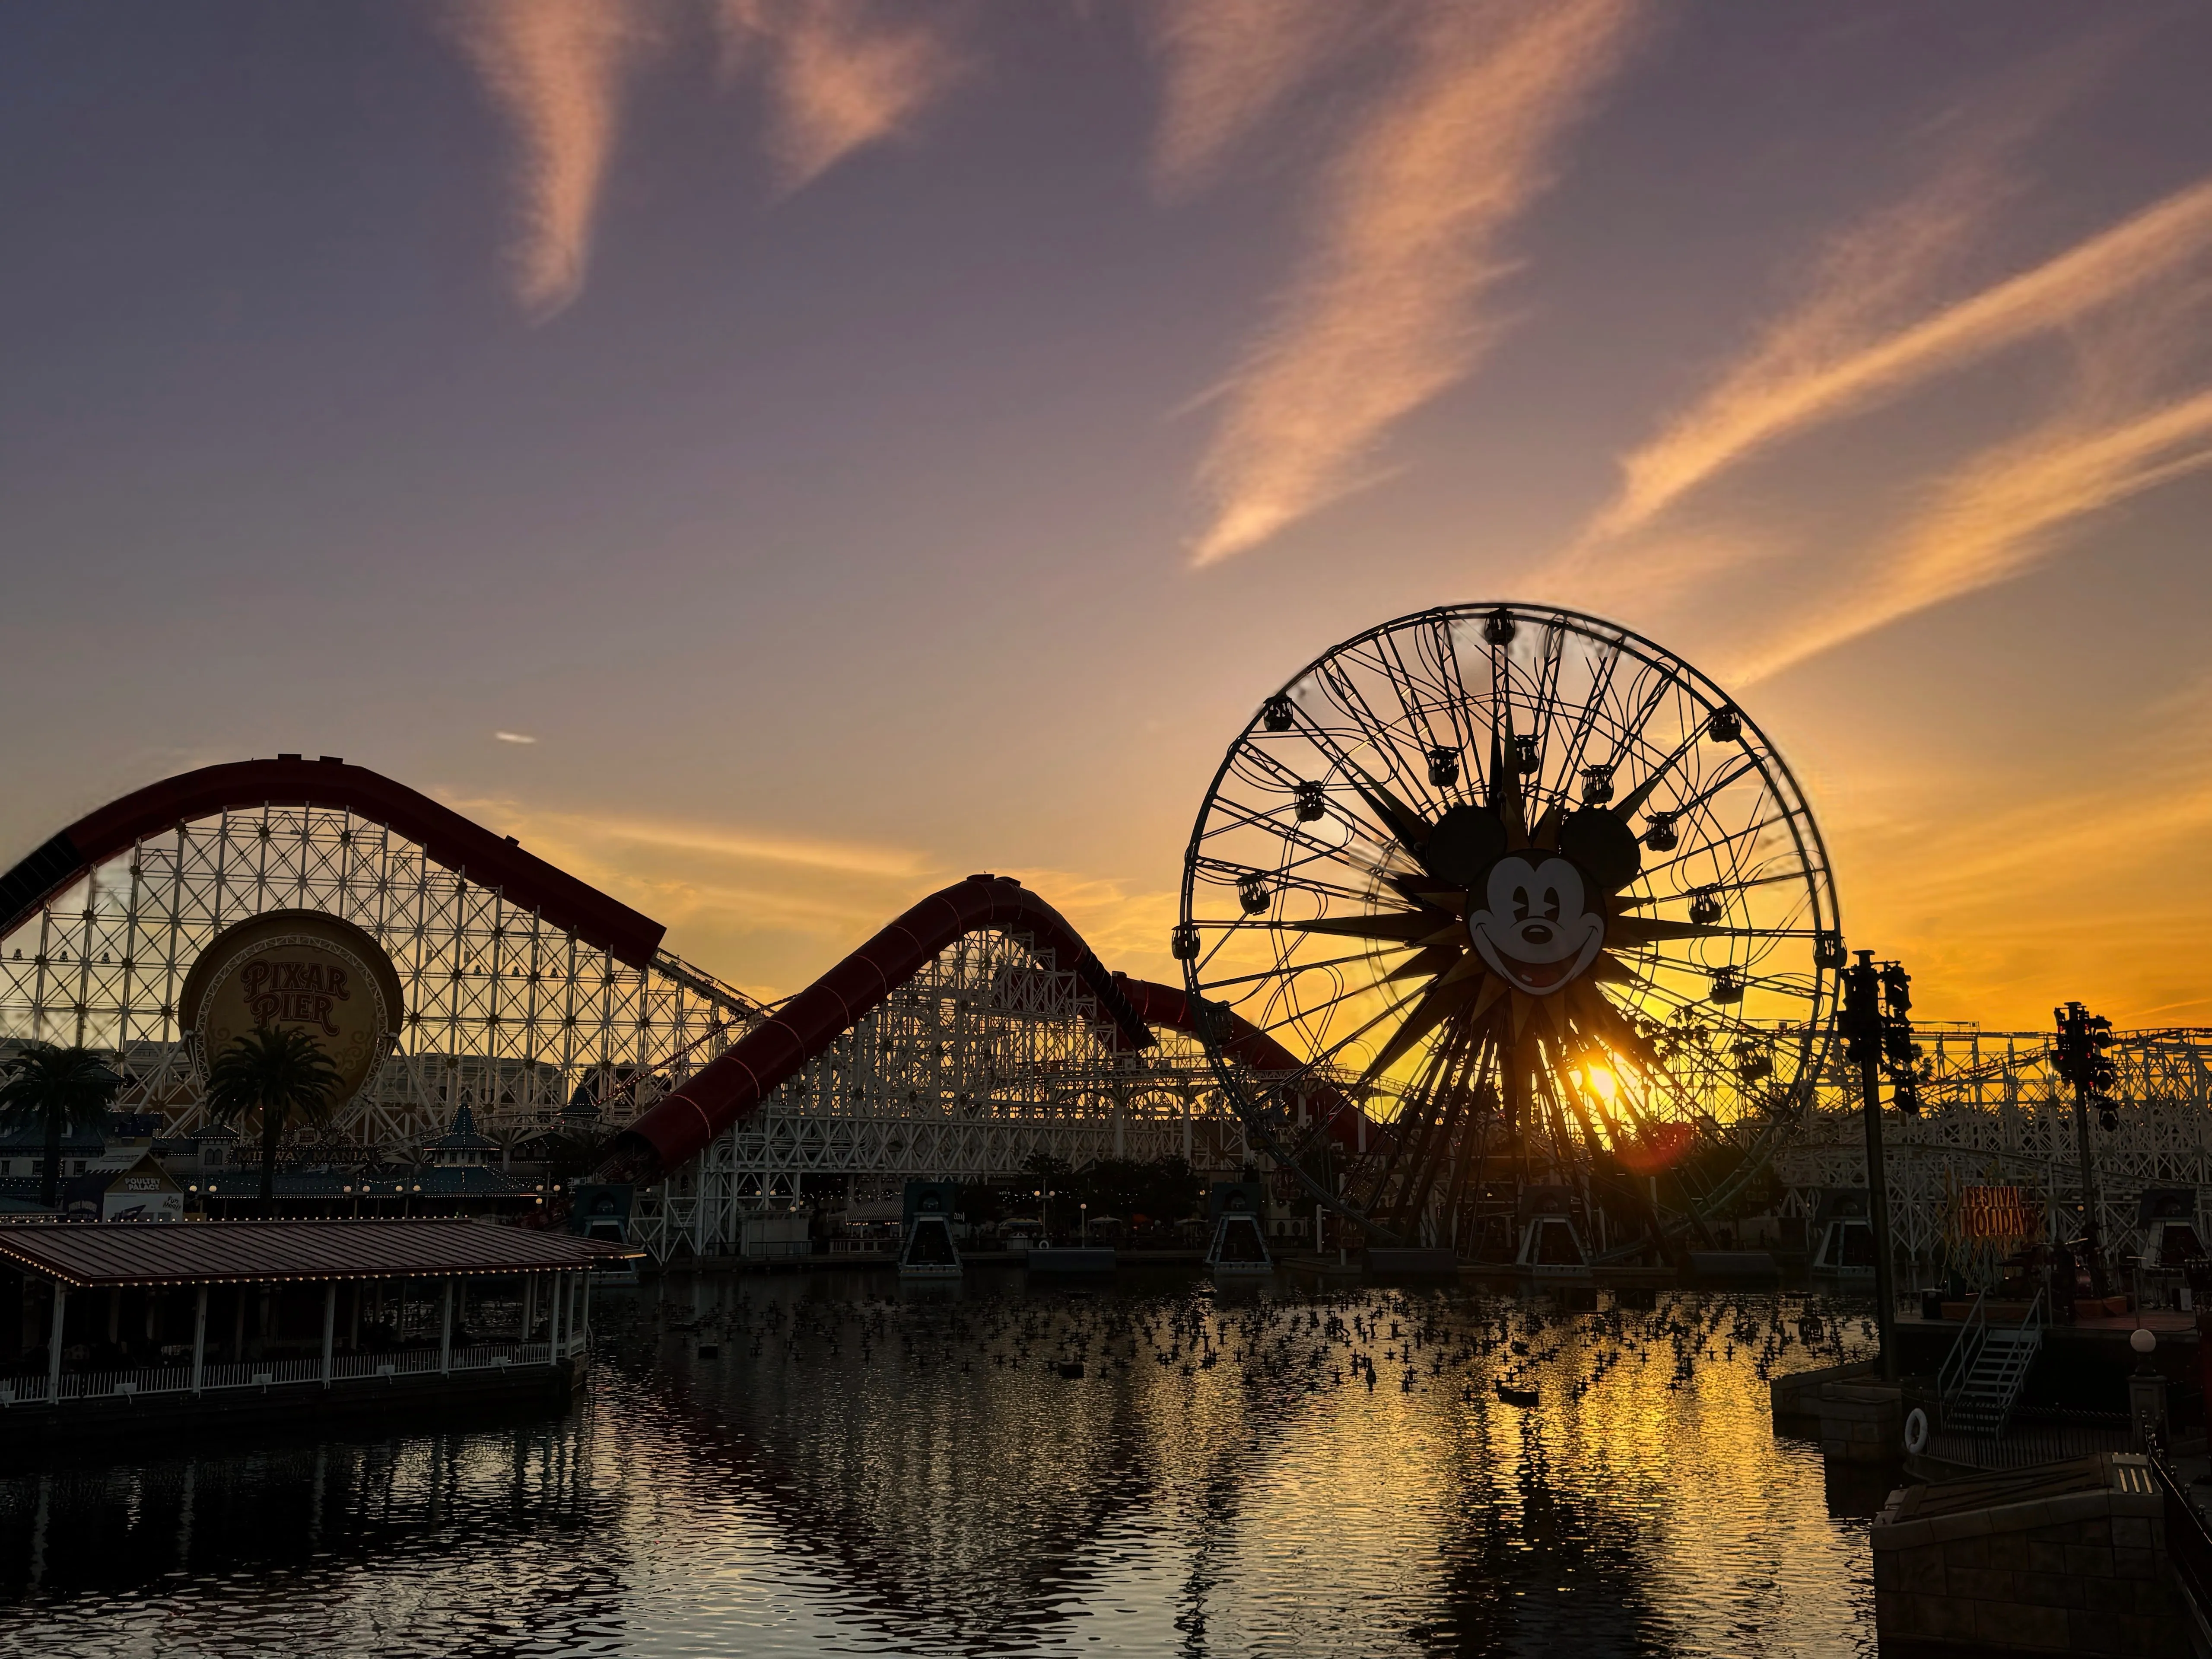
This photo, taken around sunset, received a Golden Hour effect that intensified the sunset colors and altered the clouds without any unnatural changes.
You can get some great results
In our testing, we’ve witnessed that Magic Editor can produce stunning results with the right presets and options. However, if you rely solely on the “erase” option without fine-tuning your selections, the results might appear strange or unrealistic.
Overall, Magic Editor can help you achieve some breathtaking photos if you take the time to experiment with its capabilities. Currently, this feature is exclusive to the Pixel 8 and Pixel 8 Pro models, but who knows if Google will expand its availability to older Pixel devices or even other smartphones, similar to what they did with the Magic Eraser feature.
I hope this guide helps you unleash the magic of photo editing with Magic Editor. Remember to have fun and don’t be afraid to explore different effects and combinations to create unique and impressive images!
–
Q&A
Q: Can I access Magic Editor on older Pixel devices?
A: Unfortunately, Magic Editor is only available on the Pixel 8 and Pixel 8 Pro models. Older Pixel devices don’t have access to this feature.
Q: Is Magic Editor available on other smartphones?
A: Currently, Magic Editor is exclusive to Google Pixel devices. However, it’s hard to predict if Google will extend its availability to other smartphones in the future.
Q: Can Magic Editor edit videos as well?
A: No, Magic Editor is designed specifically for photo editing. It doesn’t support video editing at the moment.
Q: Are there any alternatives to Magic Editor for non-Pixel devices?
A: There are several photo editing apps available for non-Pixel devices that offer similar or even more advanced editing features. Some popular options include Adobe Photoshop Express, Snapseed, and VSCO.
–
References
- Quickly Check macOS Magic Keyboard and Mouse Battery Level
- Google Pixel Tablet Review: Worst Pixel I’ve Ever Used
- 28” Magic Arm Review – Making Taking Pictures Easier
- Snag a Google Pixel Tablet with Charging Dock While It’s $100 Off
- Does the Google Pixel 8 Have MagSafe?
- Google Pixel Watch 2 vs. Apple Watch Series 9: A New King?
- Other smartphones as it did with Magic Eraser
–
Have you tried using Magic Editor on your Pixel 8 or Pixel 8 Pro? Share your experiences and the amazing edits you’ve created in the comments below! Don’t forget to spread the magic by sharing this article on your favorite social media platforms!